 Bank Statement Converter
  Handwriting to Text
  Screenshot to Text
  PNG to Text
  PDF to Text
  JPG to Excel
  PNG to Excel
  PDF to Excel
  JPG to PDF
  PNG to PDF
  Word to PDF
  Excel to CSV
  CSV to Excel


How to Convert PDF Bank Statements to Xero-Ready CSV Files
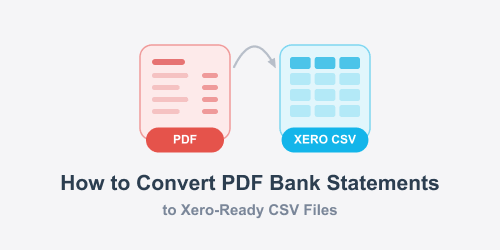
A PDF may show dates, descriptions, deposits, withdrawals, and balances in a neat table. However, that doesn't mean the information is ready to use in accounting software.
If you're using Xero, converting the transaction information into a structured CSV can make the process much easier. Instead of typing each transaction manually, you can extract the data, check it against the original statement, and prepare it for your accounting workflow.
Here's how to do it and what you should check along the way.
Why Convert a PDF Bank Statement to CSV for Xero?
PDF files are designed mainly for viewing and printing. CSV files are different because they store information in rows and columns, making the data easier to edit and process.
For example, a bank statement might contain:
|
Date |
Description |
Debit |
Credit |
Balance |
|
05/09/2026 |
Office Supplies |
125.00 |
— |
4,875.00 |
|
06/09/2026 |
Customer Payment |
— |
850.00 |
5,725.00 |
Entering this information manually can become frustrating when a statement contains hundreds of transactions.
A CSV gives you a more practical starting point. You can inspect the transactions in a spreadsheet, correct anything that needs attention, and then prepare the file according to the requirements of your Xero account and import method.
This is particularly useful for historical records where a direct bank feed isn't available.
What You Need Before Starting
Start by collecting the PDF bank statements you need to work with.
They could be:
- Monthly bank statements
- Several months of historical records
- Scanned statements
- Multi-page PDF documents
- Statements from different bank accounts
Keep the original PDFs unchanged. They are your reference if you later need to verify a transaction.
It is also worth checking the statement period before starting. If some transactions are already present in Xero, you don't want to accidentally import the same records again.
Step 1: Upload the PDF
The first step is to extract the transaction information from the statement.
A digital PDF may contain selectable text, while a scanned PDF is essentially an image. Scanned documents require OCR to recognize the text and numbers before they can be turned into editable data.
Try the bank statement converter to upload a PDF or supported image file and extract the information into a structured format.
The goal is to identify useful fields such as transaction dates, descriptions, amounts, deposits, and withdrawals rather than manually copying every line.
Step 2: Extract and Check the Transactions
Once the document has been processed via bank statement converter, look through the extracted data.
Bank statements don't all use the same layout. One bank may put deposits and withdrawals in separate columns, while another may use a single amount column. Long transaction descriptions may also continue onto a second line.
Check a few transactions from different parts of the statement and compare them with the original PDF.
Pay particular attention to:
- Dates
- Transaction amounts
- Debit and credit values
- Long descriptions
- Negative numbers
- Missing rows
- Duplicate entries
- Opening and closing balances
This review is especially important for scanned statements. Blurry text, unusual fonts, poor image quality, or complicated tables can affect extraction.
Step 3: Download the Data as CSV
After checking the extracted information, download it as a CSV file.
CSV is convenient because it can be opened in spreadsheet applications and edited before it is used in your accounting workflow.
You might end up with a simple structure such as:
|
Date |
Description |
Amount |
|
05/09/2026 |
Office Supplies |
-125.00 |
|
06/09/2026 |
Customer Payment |
850.00 |
|
09/09/2026 |
Internet Service |
-65.00 |
Another statement may produce separate debit and credit columns.
Don't worry if the first exported file isn't immediately ready for Xero. The purpose of this stage is to get the information out of the PDF so that you can inspect and prepare it properly.
Also, you can learn here how you can easily turn bank statements into excel sheets immediately.
Step 4: Check the CSV Before Importing
This is one of the most important parts of the process.
A converted CSV isn't automatically guaranteed to match the format required by your Xero import workflow. Open the file and check the column structure before uploading anything.
Make sure the dates are consistent. A statement might use DD/MM/YYYY, while another system or spreadsheet may display dates differently.
Amounts also need attention. Confirm that money coming into the account hasn't been treated as money going out, and vice versa.
For example:
Customer payment: +850.00
Bank fee: -25.00
If your original statement uses separate debit and credit columns, make sure those values haven't been mixed during extraction.
Also check descriptions. If a long merchant name or payment reference has been split across multiple rows, correct it before moving forward.
What If the PDF Is Scanned?
Scanned statements are slightly more complicated because the document may not contain actual text.
If you can open the PDF but cannot select or copy the words on the page, you're probably dealing with an image-based document.
OCR can recognize the characters in that image and convert them into editable information. This is particularly useful for older statements that were originally printed and later scanned.
However, OCR isn't a substitute for checking financial records. A blurry number can sometimes be interpreted incorrectly, and unusual layouts can cause rows or columns to be misunderstood.
For that reason, always compare important financial information with the original document before using it for reconciliation or reporting.
A Simple Workflow for Historical Statements
If you have a large collection of statements, process them in smaller batches rather than trying to handle everything at once.
A practical workflow looks like this:
1. Collect the original statements
Keep them organized by account and date.
2. Convert one statement first
Use it to check whether the extraction works correctly.
3. Review the transactions
Compare dates, descriptions, amounts, and balances with the original.
4. Export the data as CSV
Keep a copy of the converted file.
5. Prepare the CSV
Check the columns and make any required adjustments.
6. Import the transactions into Xero
Follow the appropriate import process for your account.
7. Reconcile the account
Compare the imported information with the original statement.
Working this way makes it easier to identify problems before they spread across dozens of files.
Can You Convert a PDF Directly Into Xero?
Not always in one step.
The practical process is usually:
PDF statement → extract transaction data → review → format CSV → import into Xero
The exact requirements can vary depending on your bank, region, account configuration, and the import method available to you.
Xero's bank feeds can automatically bring transactions into an account when a supported connection is available. When that isn't an option, preparing statement data for manual import can be useful.
The important thing is to treat the converted CSV as prepared data rather than assuming that extraction alone makes it a final accounting record.